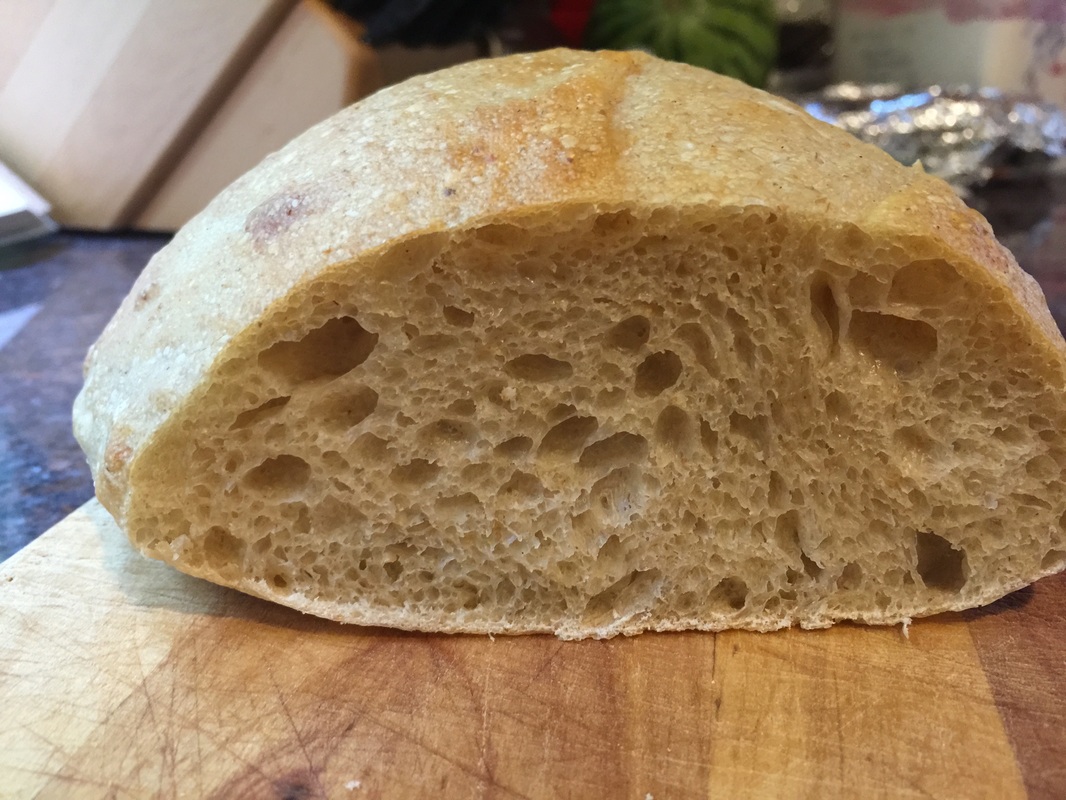
 Jeffrey Hamelman's Vermont Sourdough bread recipe. I bake two sourdough loaves every week at home. Normally, I use the Peter Reinhardt recipe found in A Bread Baker's Apprentice. This time, I wanted to try something new. I made the Vermont Sourdough with whole wheat recipe found in the Jeffrey Hamelman Bread book.
I used my fed starter with a combination of King Arthur Four Bread flour and Farmer Ground Whole Wheat Bread Flour. Farmer Ground is a New York State wheat grower and mill. This particular flour is based on a red colored heirloom wheat. As they say on their website, " Also sometimes called “half-white” flour. This flour averages between 12.5 and 13.5% protein. It contains all the original germ and a small portion of the original bran. Slightly darker in color than conventional white flours, but much closer in performance to a white flour than a whole wheat. This sort of high-extraction flour is what in Europe would be called “T-85,” the same sort of flour used by the Poilan Bakery to make their world-famous Miche." I used this flour a few weeks ago to bake a Miche style bread (Miche is a very large 100% whole wheat bread produced and sold in French bakeries, like Poilan) and the results were incredible. It gave me a nutrient dense loaf that you would expect to be heavy, but it wasn't heavy. It was light, tender and delicious. What's more, the bread stayed fresh for almost a full week. Each day it changed in character and flavor, giving me a totally new experience. So, I was excited to use it in combination with my tried and true standard bread flour from King Arthur Flour. Both of them are high protein flours, giving the loaves between 12 and 14% of protein each, which resulted in fabulous gluten development. Now, most people allow this bread to proof overnight, and the next time I make it, I will do that. However, I started too late in the day and didn't have time to give it an overnight rest, so I was up at 1am folding my dough and 4am shaping loaves for a 6AM bake. Because it's been hot, even overnight, the room temperature has been holding at about 75-77 degrees, so it was equivalent to keeping the bread dough in a proof box through the entire process. I firmly believe that adding cold proof to any sourdough baking process will result in a pretty spectacular loaf. However, these loaves still gave me fantastic and complex flavor without the cold ferment. I had a pronounced sour flavor that sweetened on the palate. I loved the crumb structure and large air holes. My only issue was with the crust - and this was my fault. I knew that 420F degrees would be too low in my home oven to produce a beautiful crust. The book said bake at 420F and it was my first time using this formula, so I did. Next time, I am going back to working with higher oven temps - like 525F - for my sourdough baking. All in all, I am a fan of this well tested and reliably delicious formula. I'll continue to keep in my weekly bake rotation.
0 Comments
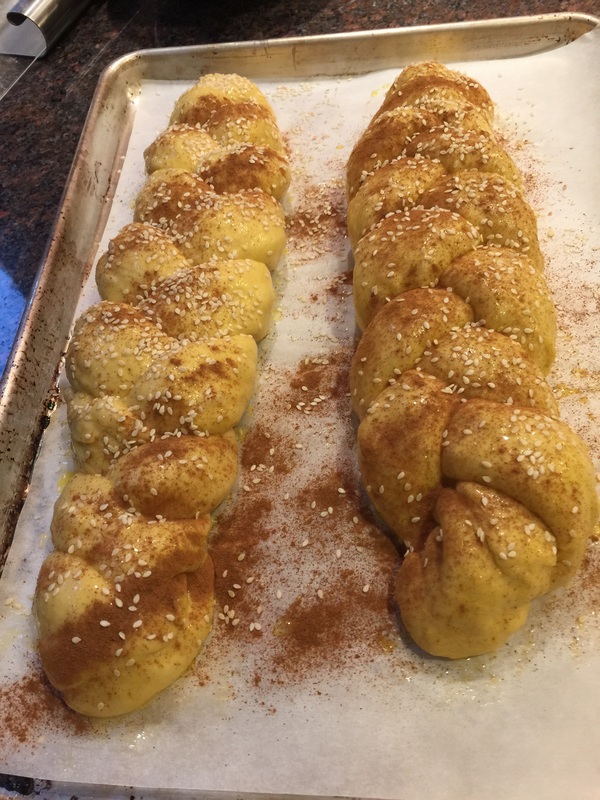
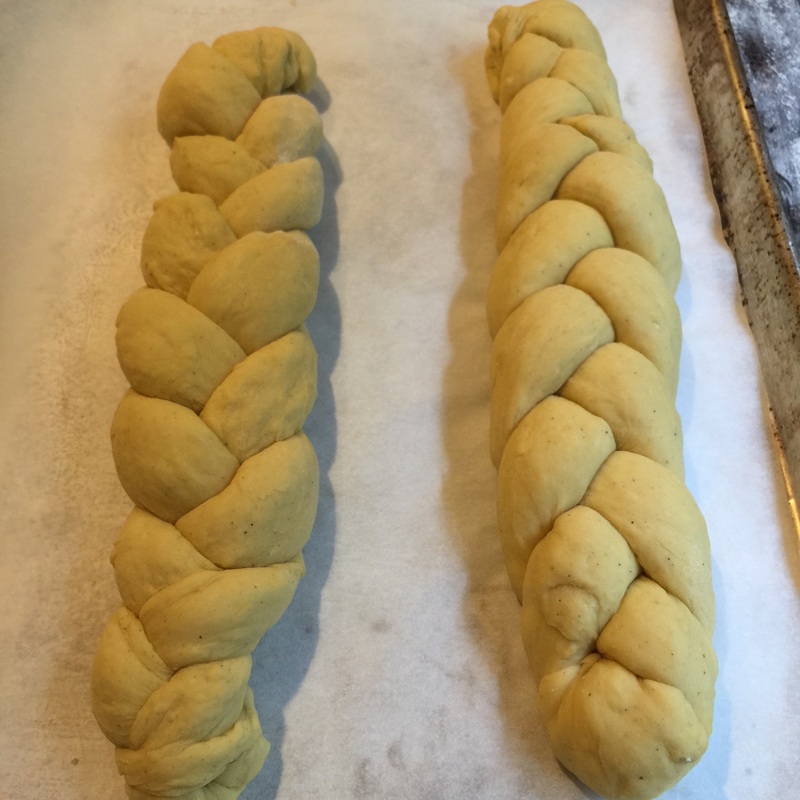
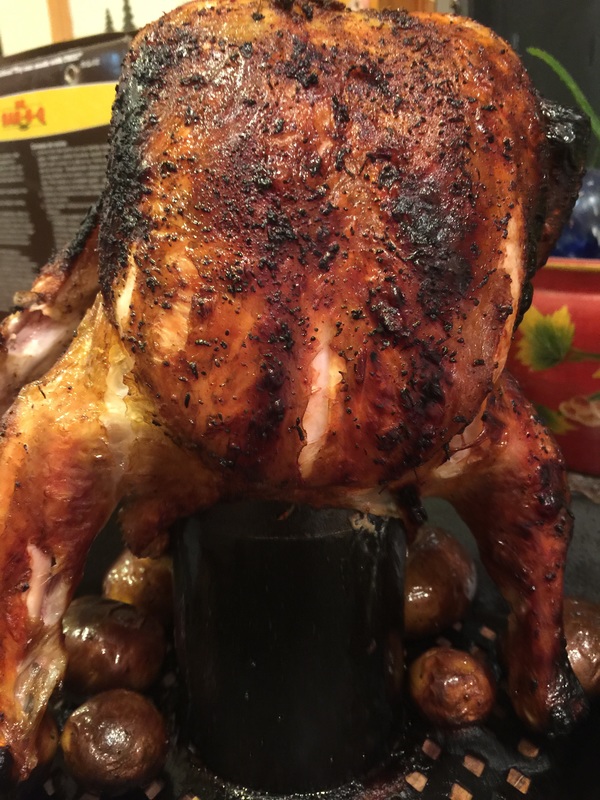
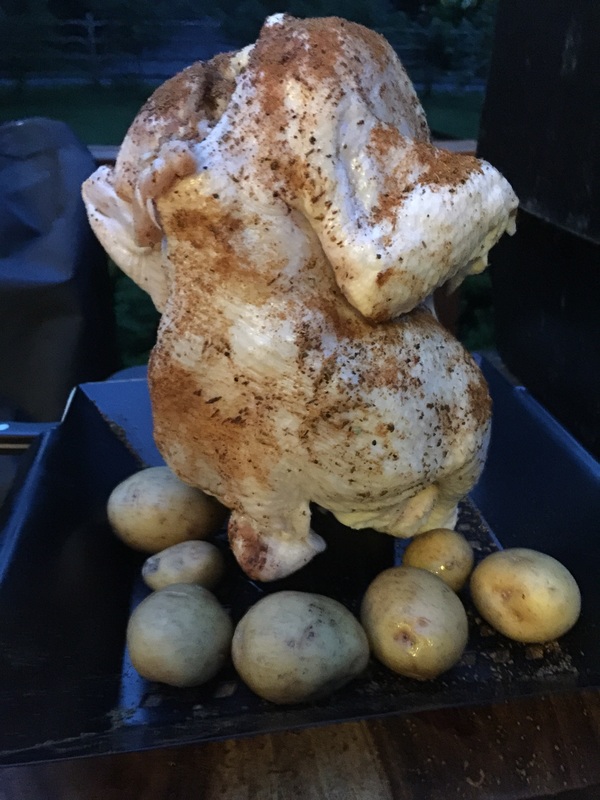
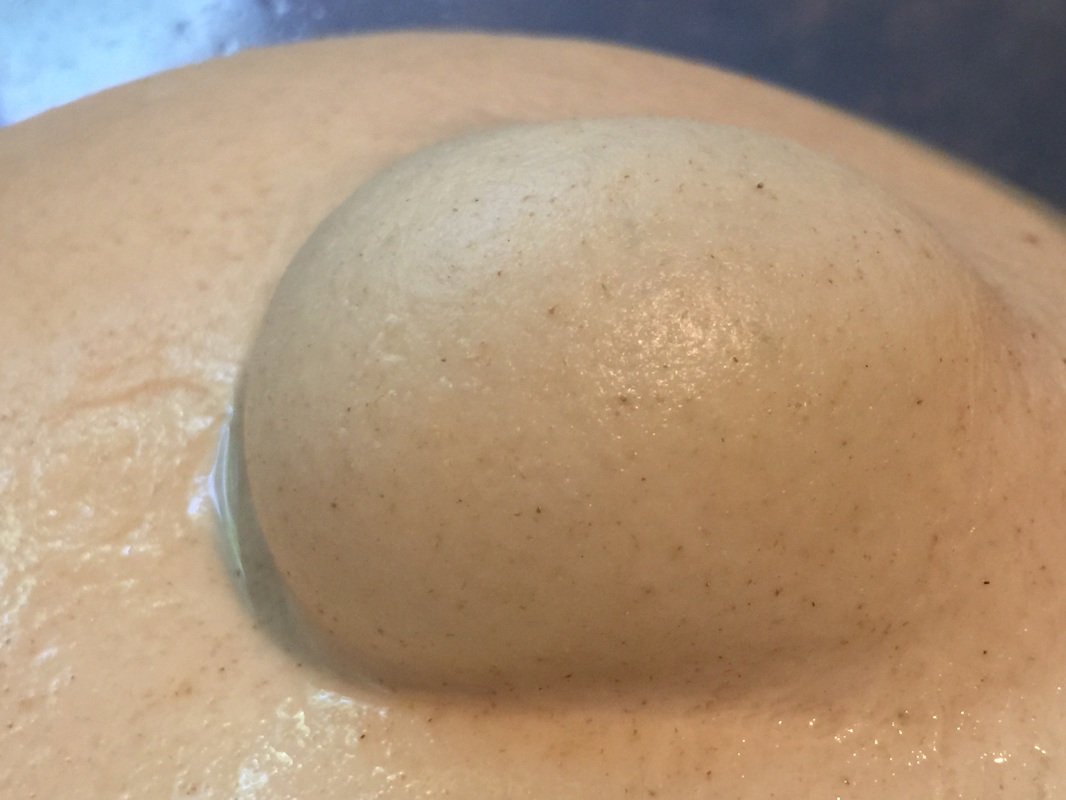
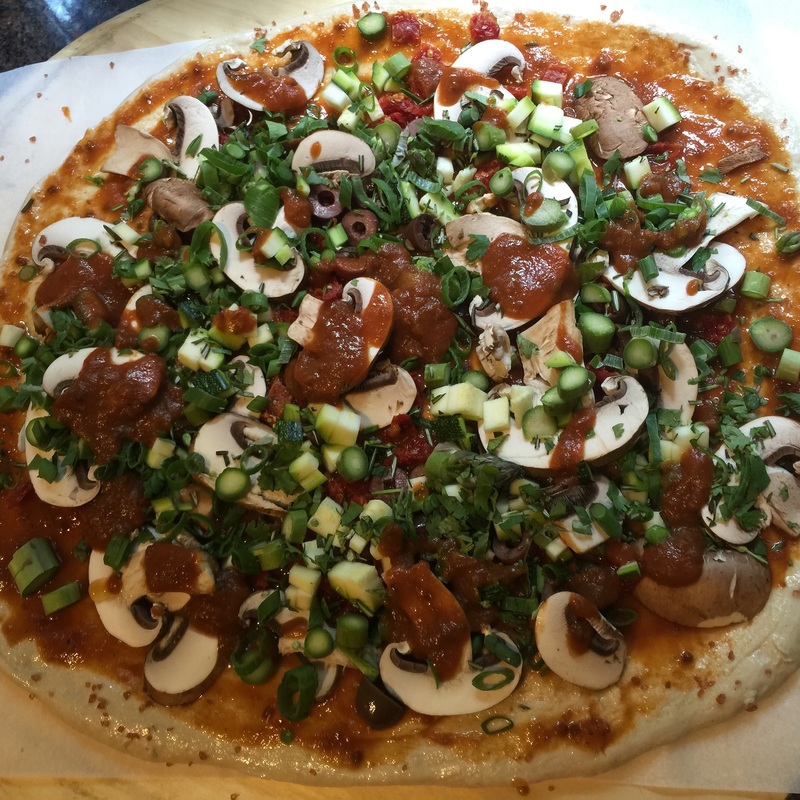
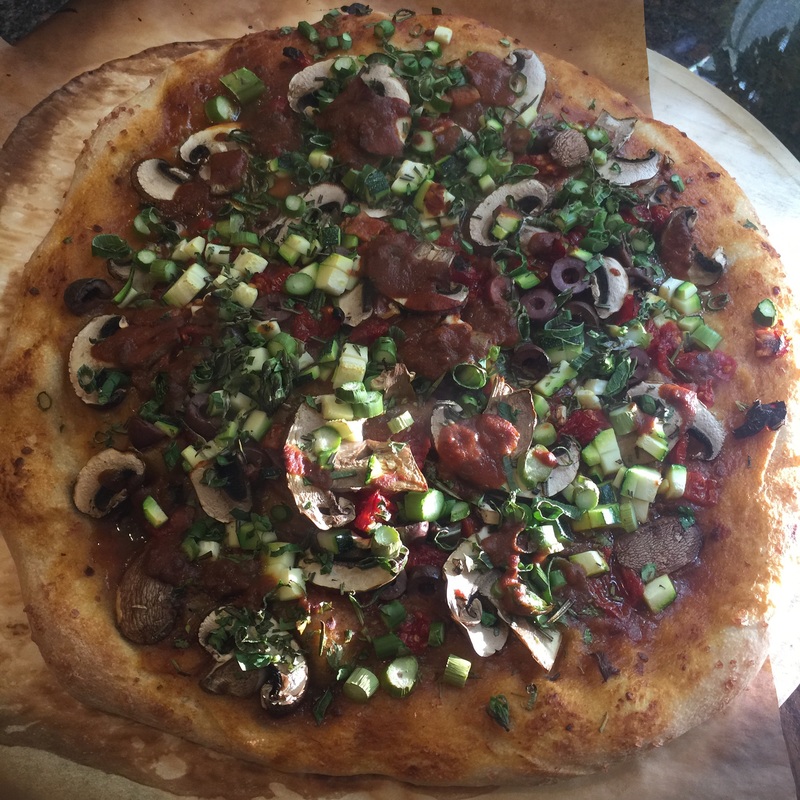
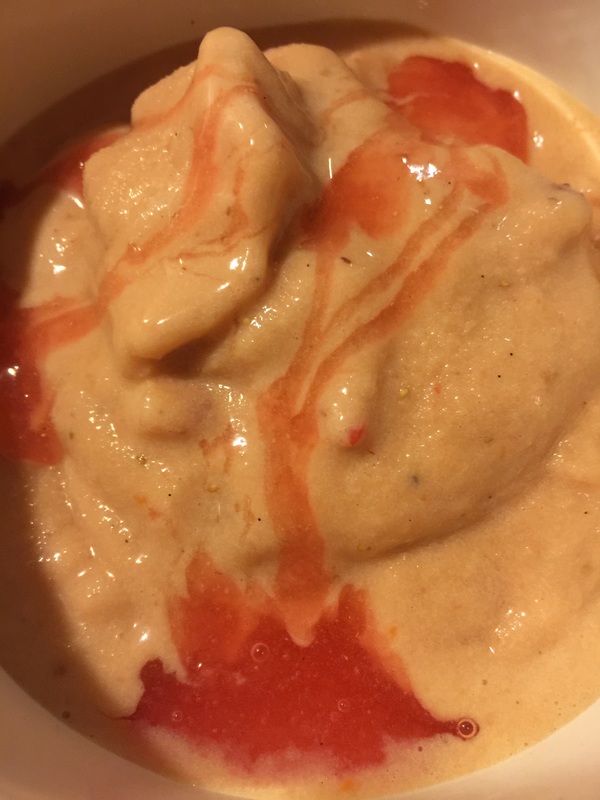
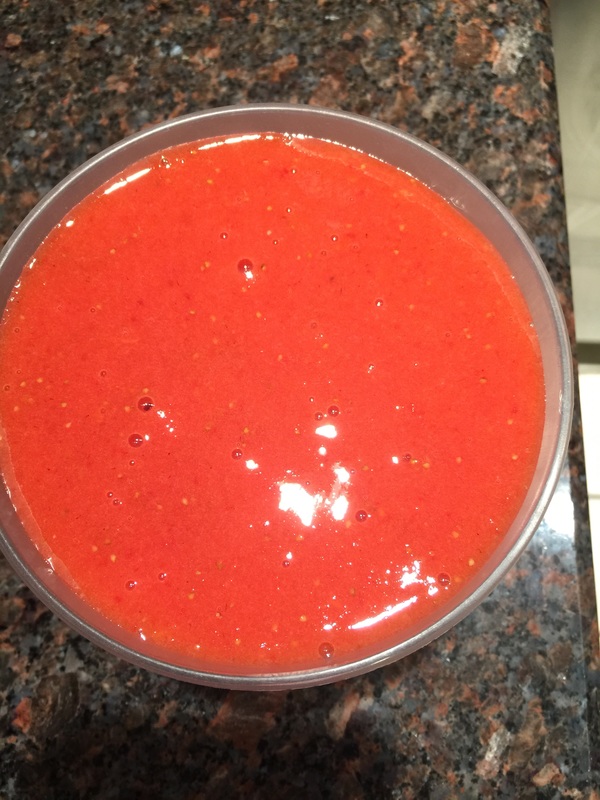
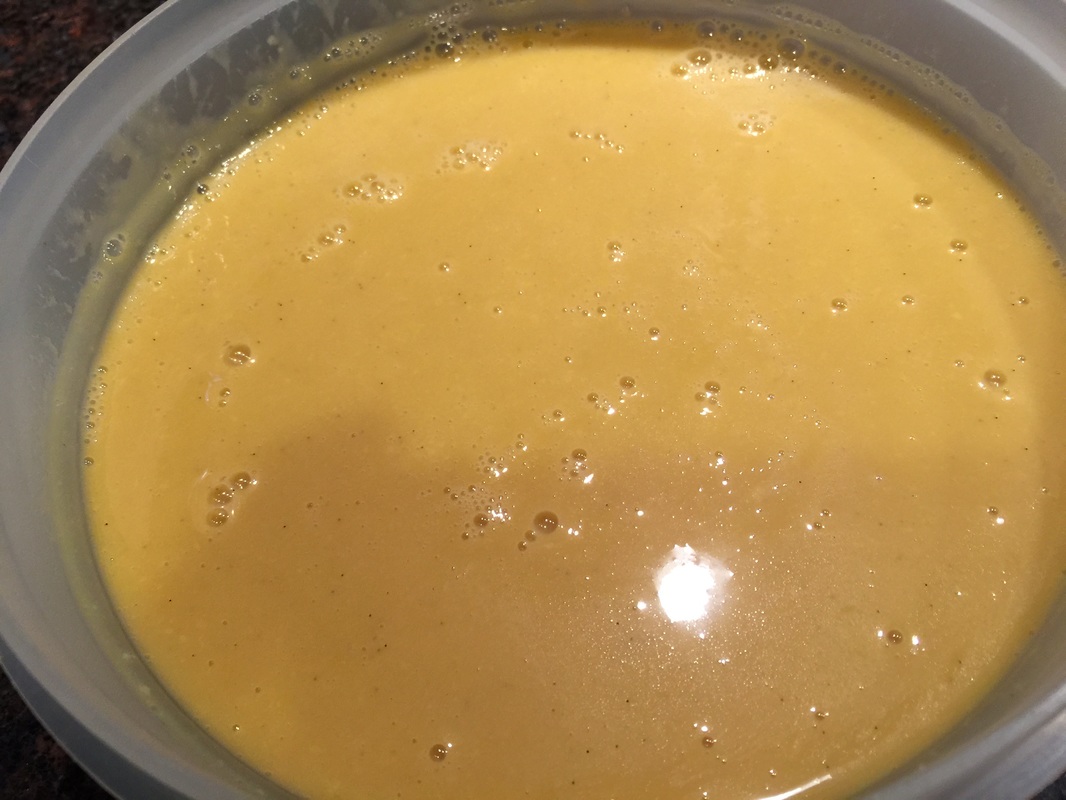
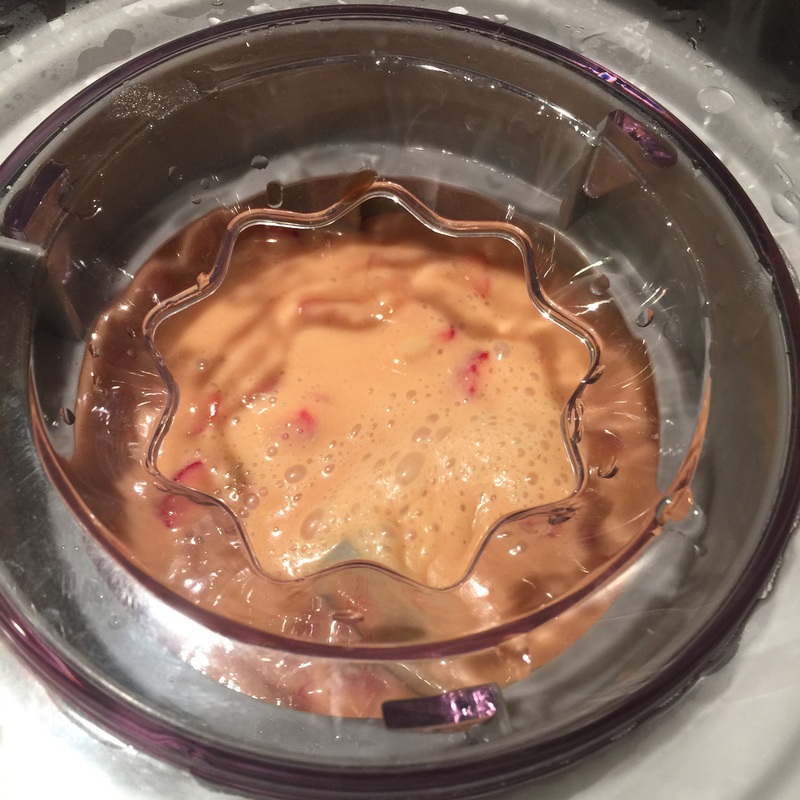
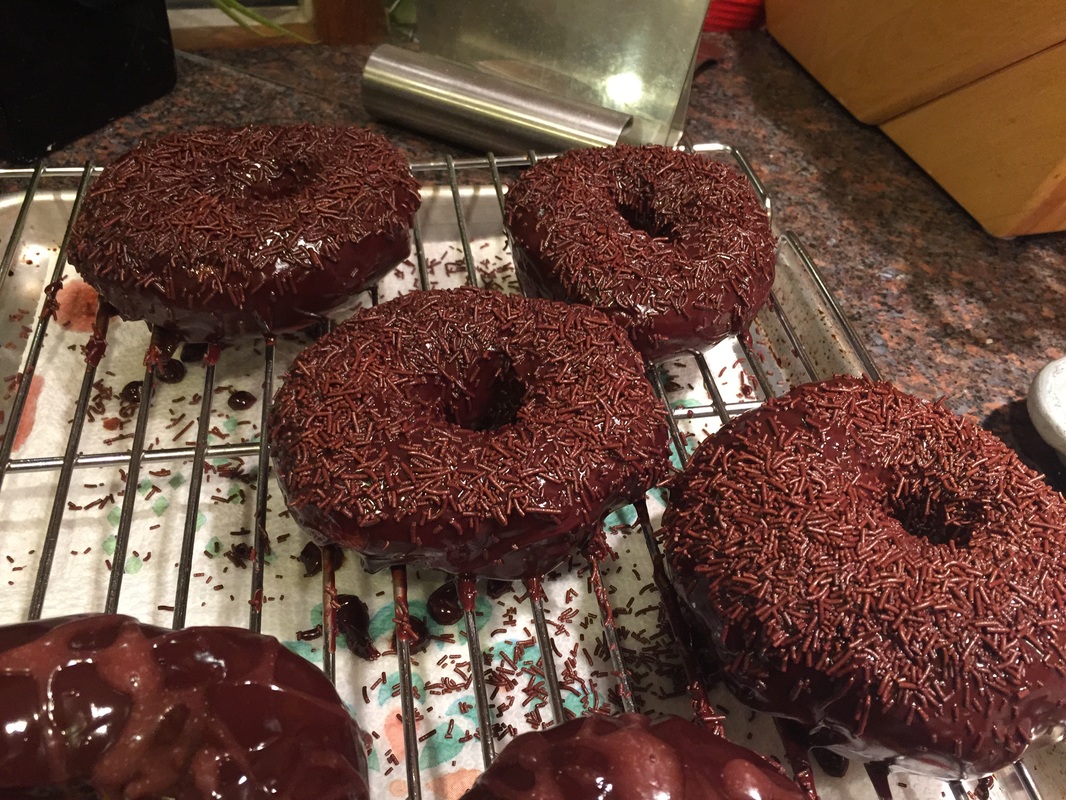
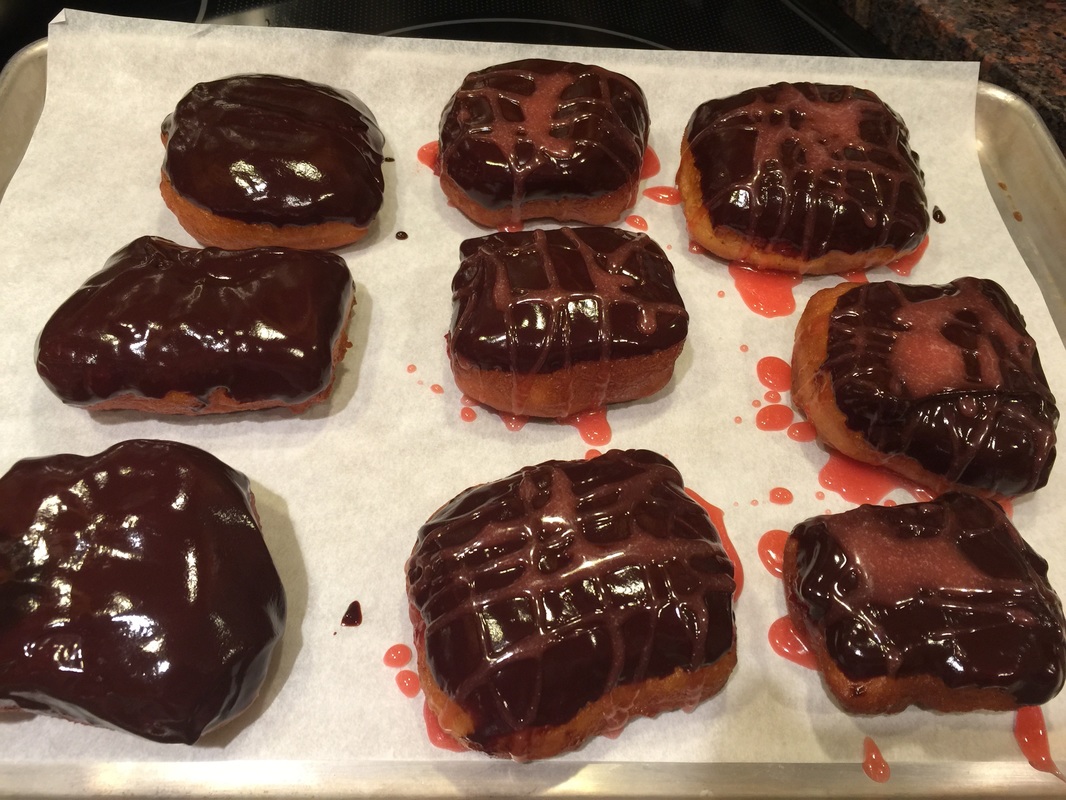
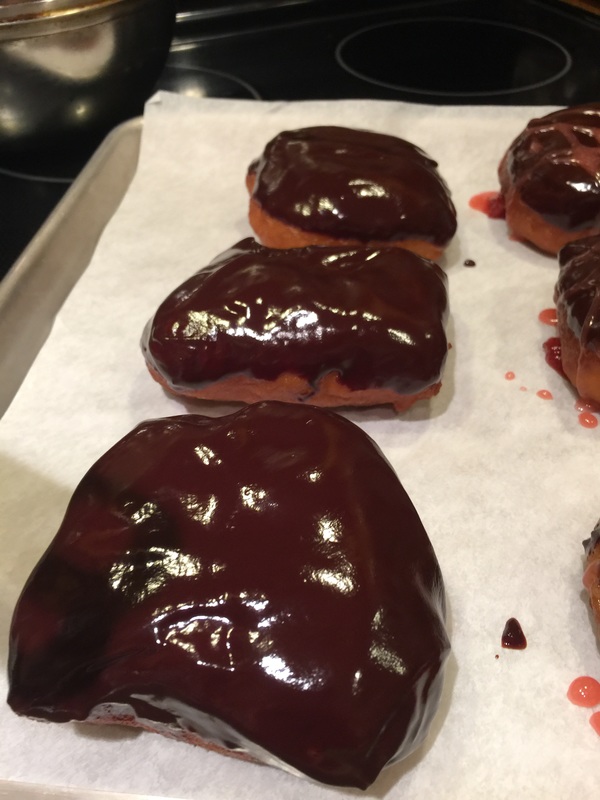
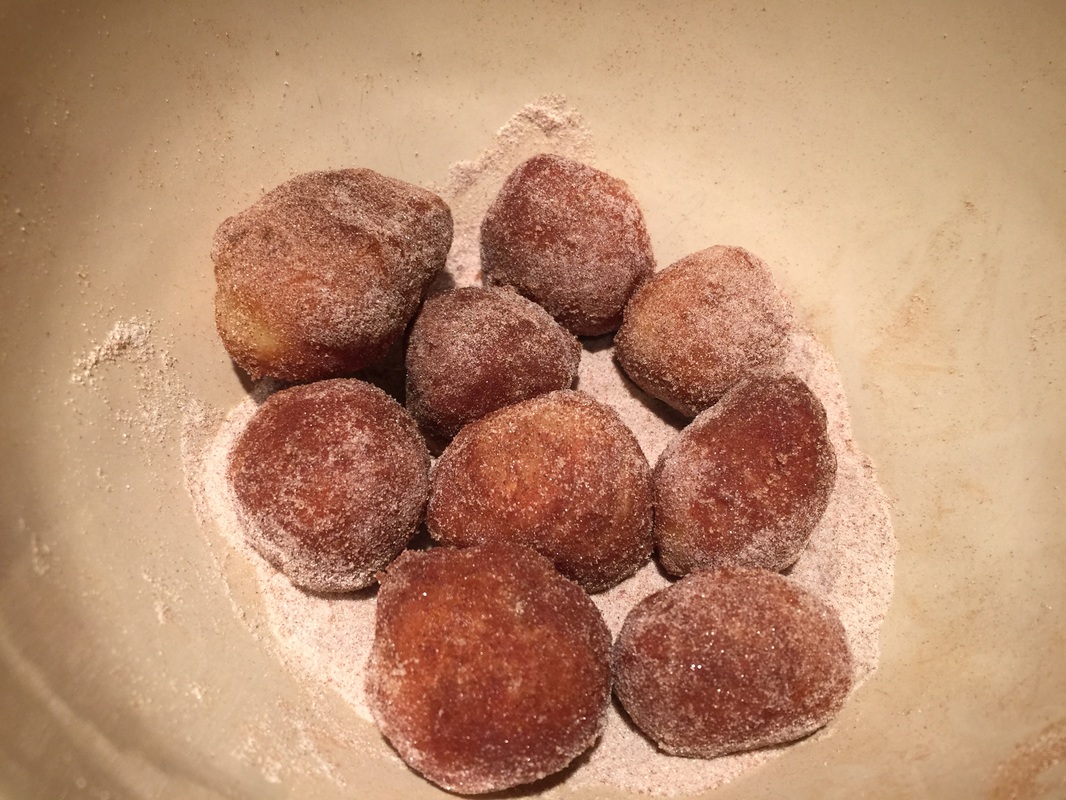
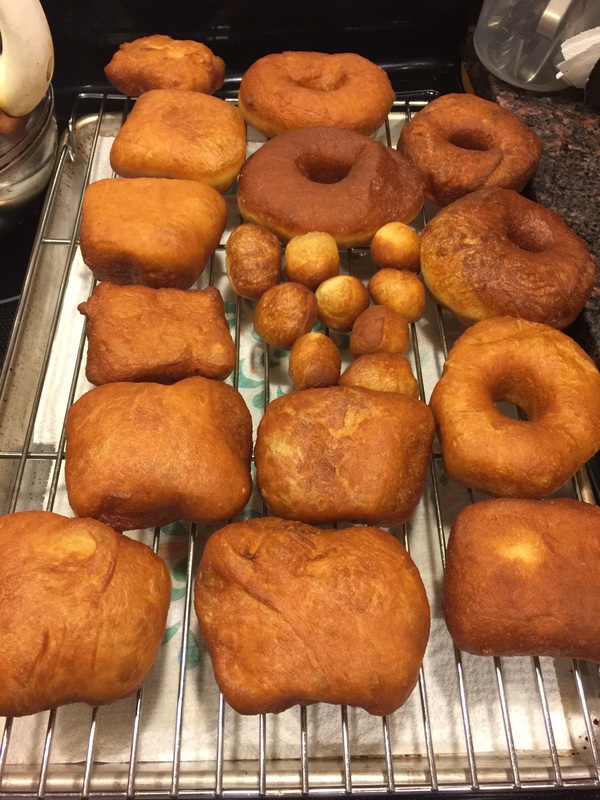
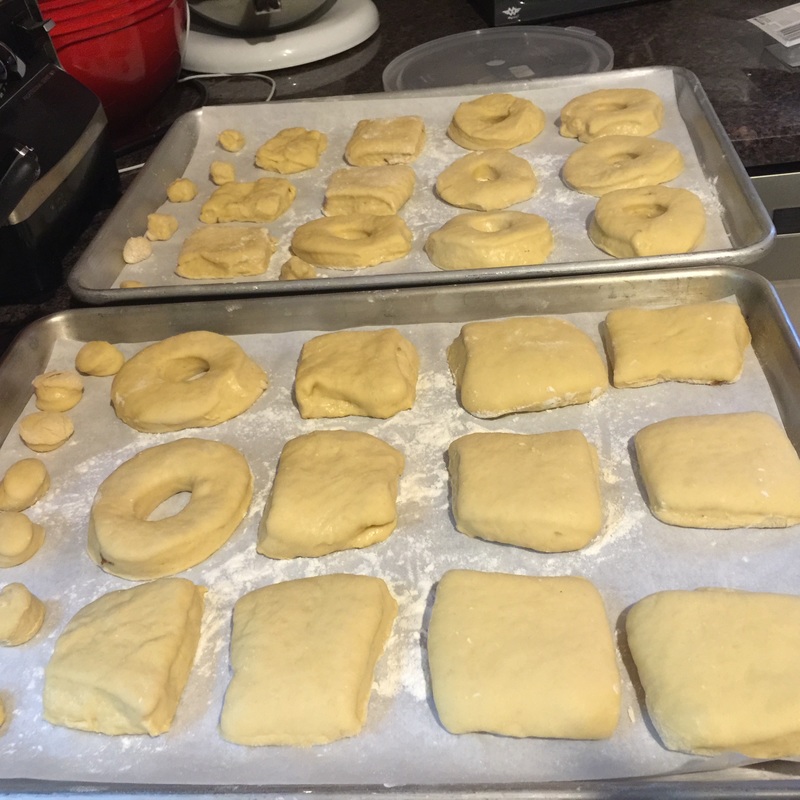
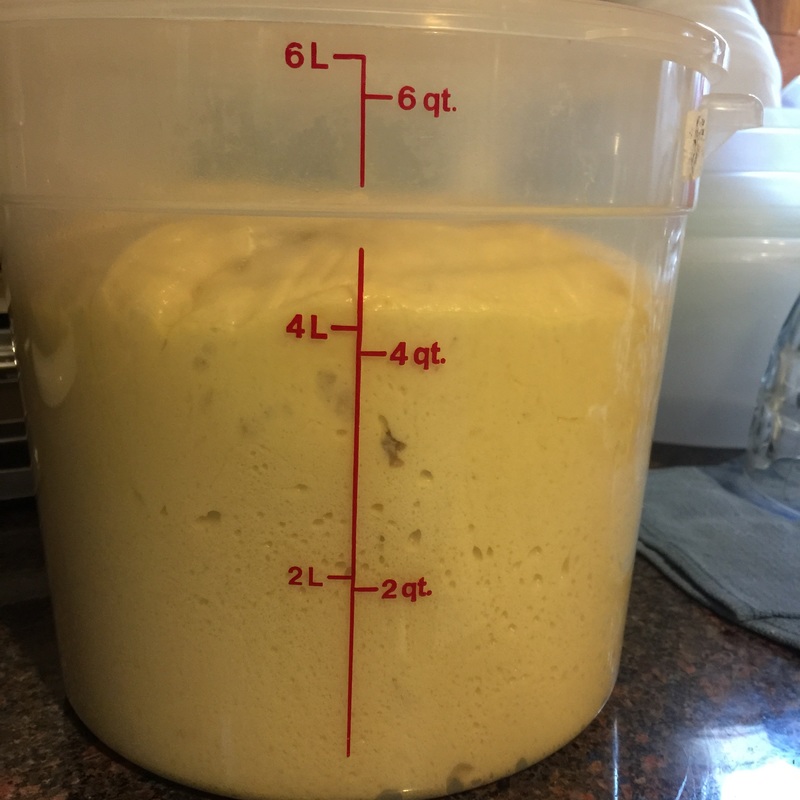
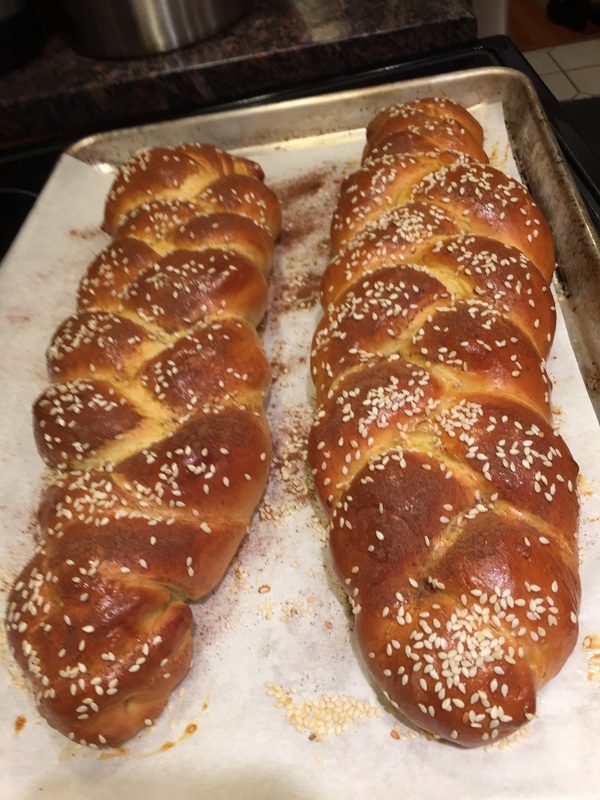 Pan de Calabaza I have a few friends on Instagram that bake weekly from this fantastic book called A Blessing of Bread by Maggie Glezer. The book chronicles the recipes of many old-world Jewish bakers, capturing their traditional recipes, handed down for generations, and preserves them. I watched these two incredible bakers @thelavenderbakery and @lisamcohen produce one stunning loaf after another from this book and I knew I needed to join them. My first bake is the Pan de Calabaza, which is a Sephardic pumpkin Challah bread made with pumpkin, cinnamon and cardamom. I bulk fermented the dough in the fridge for 24 hours before shaping the loaves. Then I allowed them to proof on my counter for a couple of hours, brushed them with an egg wash, sesame seeds and a touch of cinnamon, and baked them. MY HOUSE SMELLED AMAZING as I baked this bread. I wish I could capture that smell and share it with you. I plan to cut into these loaves and taste them tomorrow, when a friend comes over for lunch. I believe the recipe for this bread has been published online through Fresh Direct, if you want to try making it. 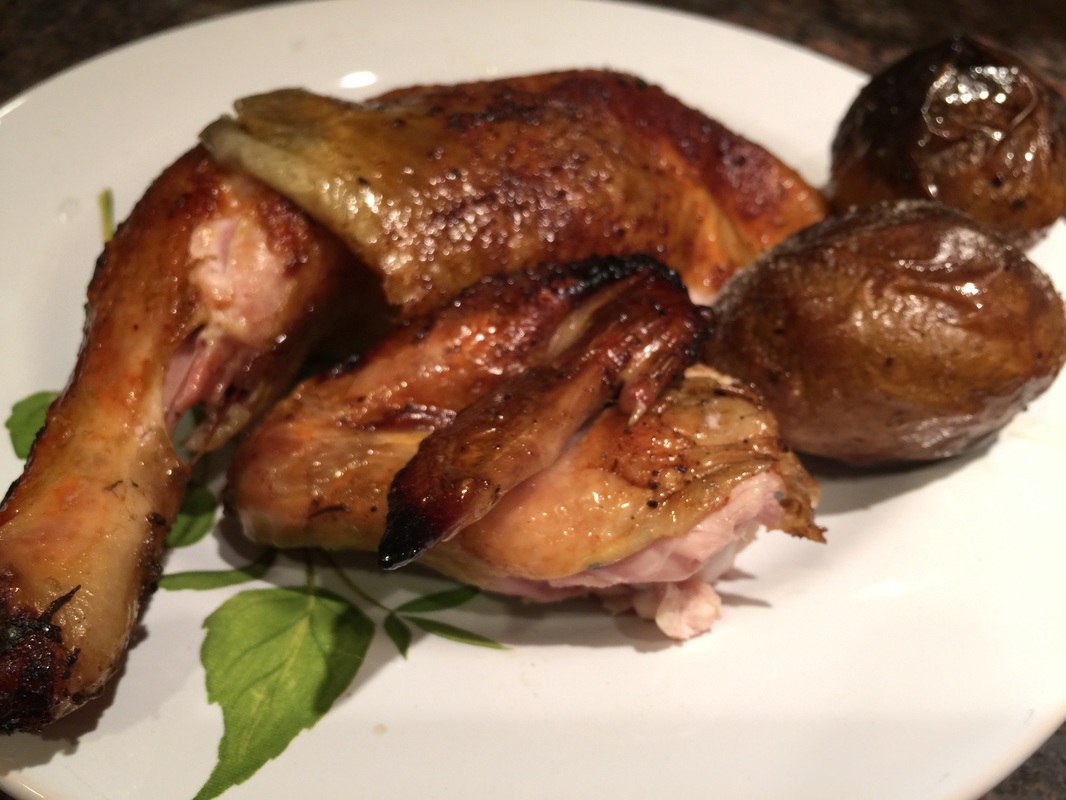 Grill-roasted Chicken and Potatoes I bought myself a present today, a store I visited had one of those "beer can" roasters on sale for $5 and I figured, "what the hell." SettSe So, I fired up the grill, popped some garlic, lemon, sake, rosemary, and green onion into the center, stuck the chicken on the vertical steam tube and pat it with a favorite spice rub. I sprinkled a few potatoes on the bottom the tray and "baked" the chicken on the grill with the lid closed for about 25 minutes, until a thermometer read 170 degrees. I was very pleasantly surprised at how moist and delicious my chicken turned out. This method gave me super crispy skin and moist tender and juicy meat. The fat dripped over the potatoes giving them a crispy skin and soft, tender filling. Project Grill-Roasted Chicken is a success! 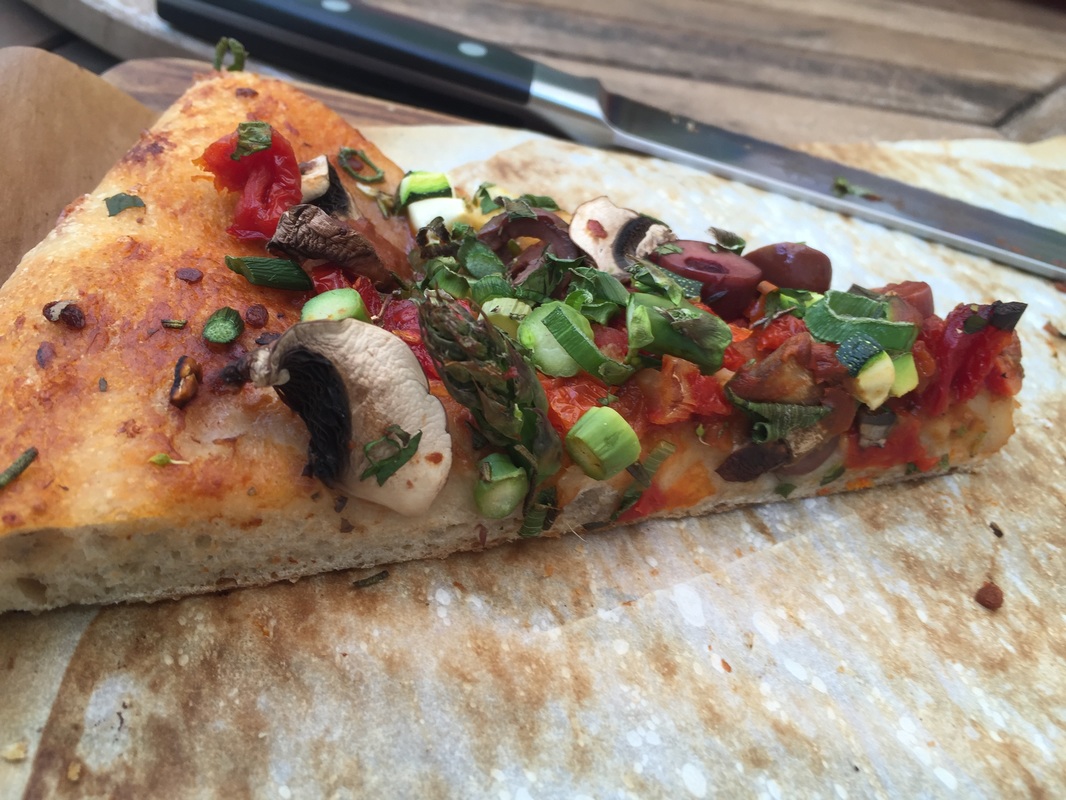 Last slice of vegan sourdough pizza made with extra virgin olive oil, homemade heirloom tomato sauce, sun dried tomatoes, kalamata olives, mushrooms, asparagus, zucchini, and a touch of Hawaiian red sea salt. The incredible Barbara Elisi introduced me to the Sunrise Flour Mill in Minnesota, and they are growing heritage wheat. Modern wheats have evolved to make the process of farming and harvesting easier. However, modern wheats can be difficult to digest. Many people first look at gluten as the culprit, but often it's the type of wheat, or the chemicals used to process that wheat that cause the sensitivity. Barbara raves about them. In addition to the heritage wheat that I purchased from them, we got to talking about pizza. They make a flour that is similar in style, performance, flavor and texture to the Caputo 00 that many pizza makers depend upon. Of course I bought their pizza flour and gave it a shot. I also started to veer away from the standard King Arthur Flour sourdough pizza recipe that I often use. The biggest difference is the addition of oil, and the change in flour. Ingredients: 241 grams fed sourdough starter 298 grams flour (I'm using the Sunrise Flour Mills Pizza flour) 100 grams hot tap water 20 grams Extra Virgin Olive Oil 1 teaspoon bread salt 1/2 teaspoon SAF Red Instant Yeast I mixed the dough until it formed a ball and "cleaned up" the sides of the bowl in my mixer (about 5 minutes), then I kneaded the dough on the countertop (no flour or oil) with a bench scraper until I got a perfect "window pane." Then I put the dough into an oiled dough bucket and let it ferment in the fridge for about 4 days. I knew it was ready when it started to rise (That takes much longer with a cold ferment) and double in size. It was bubbling like crazy in the warmth. I couldn't wait to see it bake. I took the dough out and let it come to room temperature on the counter for about 3 hours (approx. 75F degrees). I preheated my pizza steel to 550F degrees for about an hour and a half. Then I shaped my loaf and put my toppings on it. What I noticed immediately about this crust is that it was much easier to shape. I didn't have to worry about my dough stretching too fast, or unevenly - like I do with the other formula. This was easy. The dough gave me an even browning, a lovely texture and okay air holes in the crumb. What stood out the most was the flavor. This dough is delicious! The taste really makes this pizza crust a winner!! 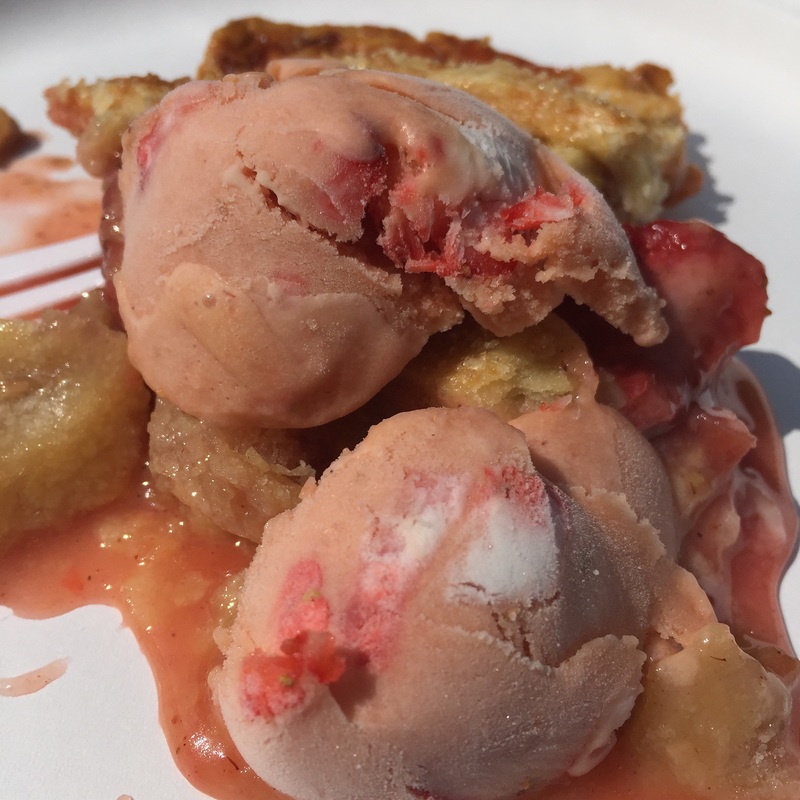 Strawberry Vanilla Coconut Milk Ice Cream on top of Strawberry Rhubarb Pie It's hot outside. A pastry chef friend mentioned something about making non-dairy ice cream (she's amazing at it) and that sounded like a good idea, so I decided to try it. I used the New York Times Master Ice Cream recipe and replaced the heavy cream and whole milk with coconut milk and coconut cream. I also added vanilla beans to my custard as it cooked. Since I didn't feel like waiting hours for the custard to cool, I stuck it in the freezer briefly while I worked on my strawberries. I hulled about a pint and a half of strawberries. I put a pint into the vitamix with lemon zest, juice from 1/2 the lemon and some sugar and pulverized it. The rest I cut into bite sized pieces. We poured the custard and the strawberries into the ice cream machine, and waited for it to freeze. Once it did, we put the bulk of it in the freezer to finish setting up, but we could't wait, we had to try some in it's semi frozen state. We drizzled some strawberry coulis on top and -- YUM! 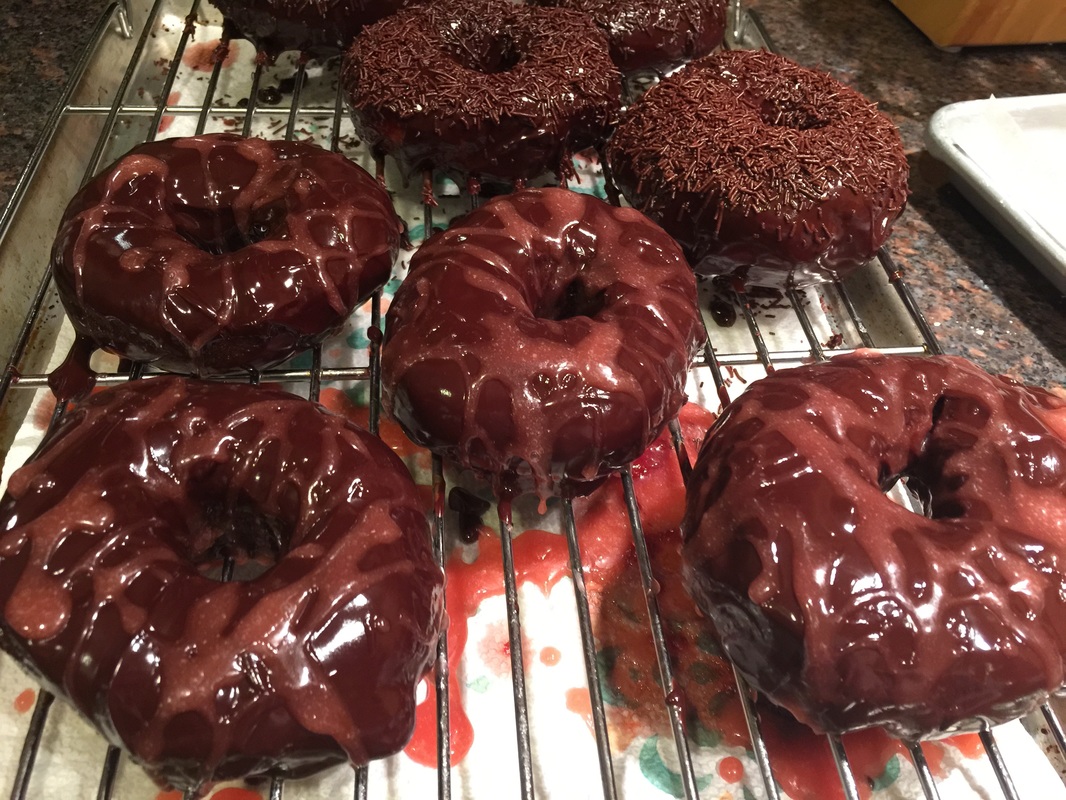 Chocolate coated yeast donuts with strawberry glaze, in the back is chocolate with chocolate sprinkles I have a dear friend that is home sick with high fever for the past few days. She's just starting to recover a bit and I wanted to bring her something sweet and fun and comforting -- so I decided to make donuts. After playing with Barbara Elsi's sourdough donuts last week, I learned a lot about the texture and donut shaping process. So this time, I was able to keep them closer to their proper shape. Also, I pan fried Barbara's recipe. With this recipe, I deep fried them as traditional donuts. I took Jenny McCoy's donut course on Craftsy and made the yeasted dough recipes in the course materials with four changes: a) I used Earth Balance buttery sticks instead of butter; b) I used almond milk instead of whole milk; c) I used SAF Gold yeast; and d) I used lilac scented sugar that I made last month when the lilac flowers were in bloom. The yeasted dough went CRAZY while fermenting. It started just below 1 quart and rose about a quart every 15 minutes - ending at around 4 quarts before I rolled out my dough. They only needed about 10 minutes to proof before going into the oil. I heated my oil too hot at first so the first few were really dark. But once I got the oil back down to 350F, things went much smoother. For the Jelly - I had actually made strawberry jam that I had canned earlier in the week, so I just used that jam. Filling the donuts was interesting. First, I tried using my filling tip without a coupler in the piping bag. That was a mistake. Jelly went everywhere. So, after setting up bag #2, I used a coupler and I tied the back of the bag so the jelly could only go where I wanted it to. For the toppings - I made four of them:
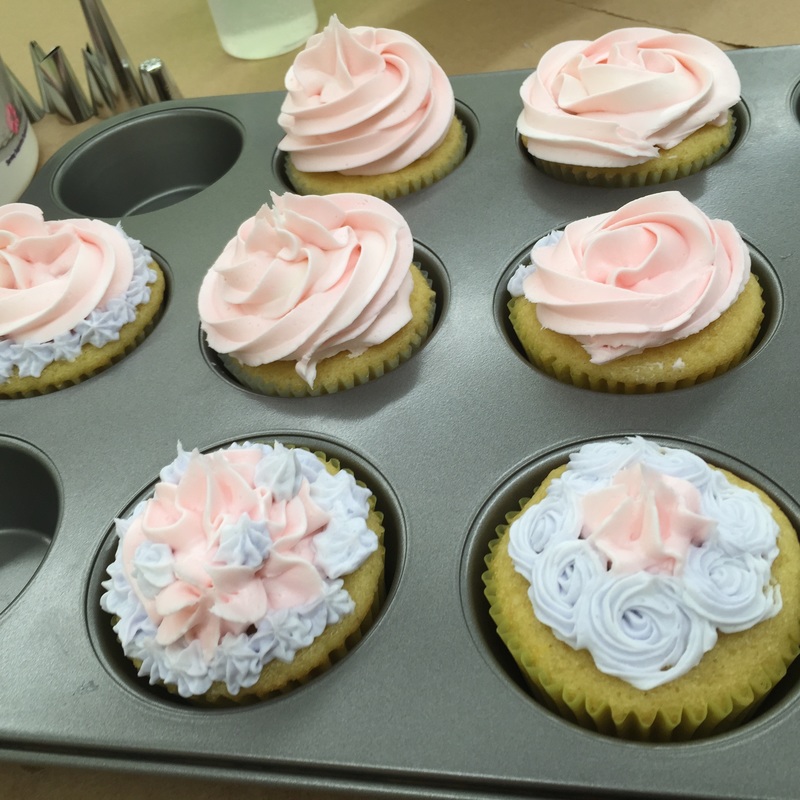
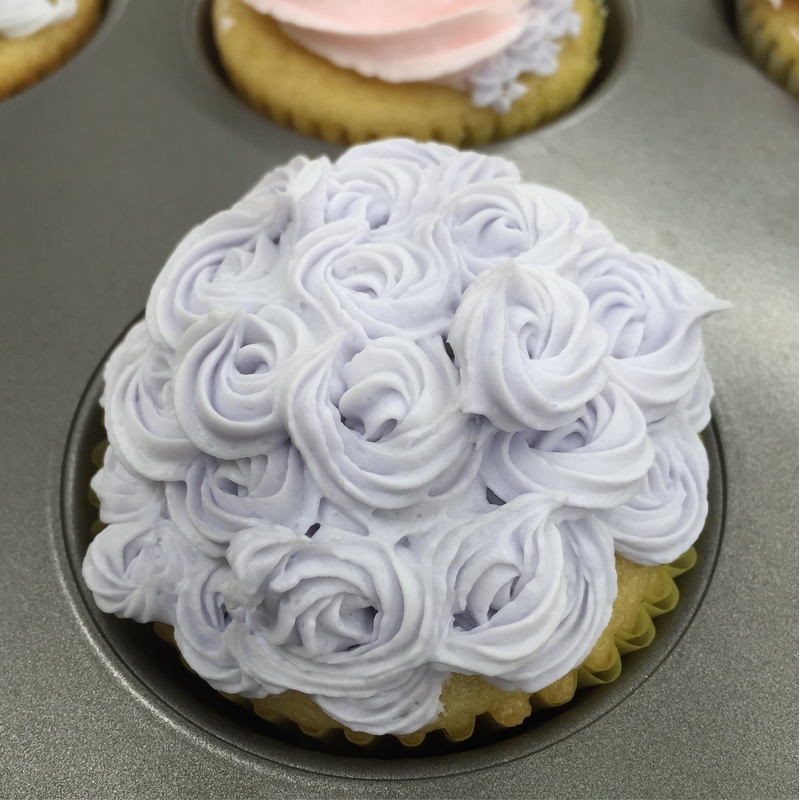
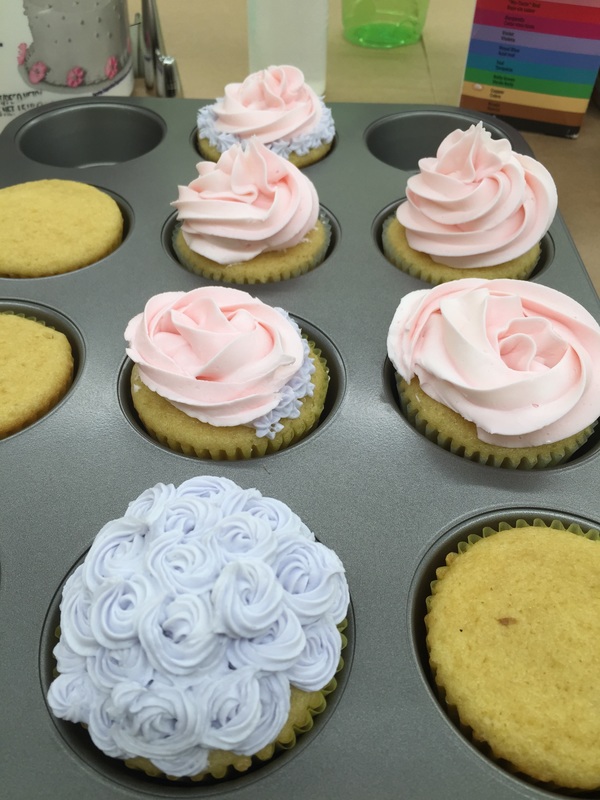
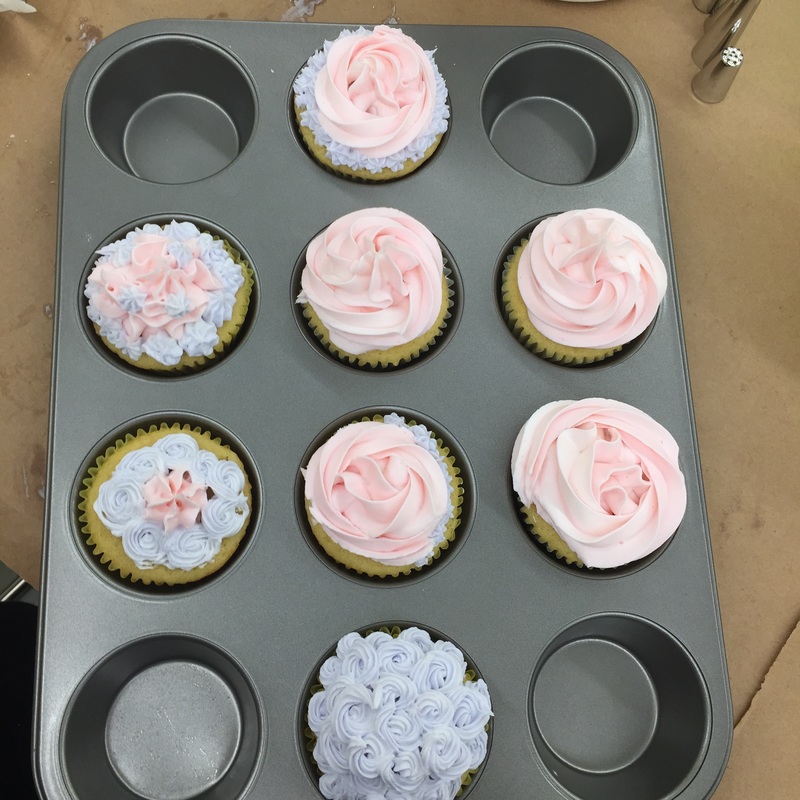
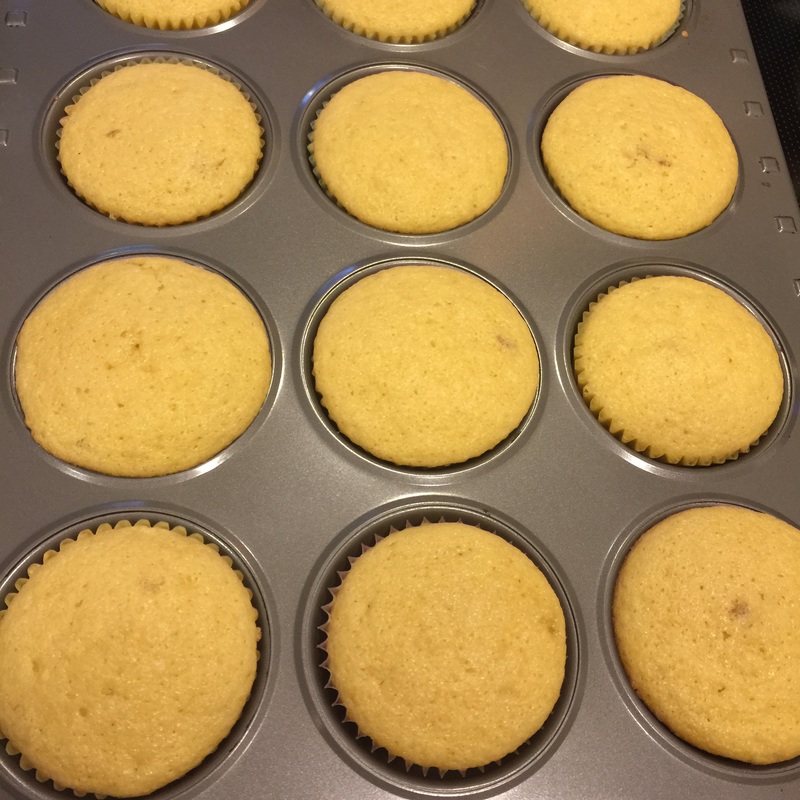
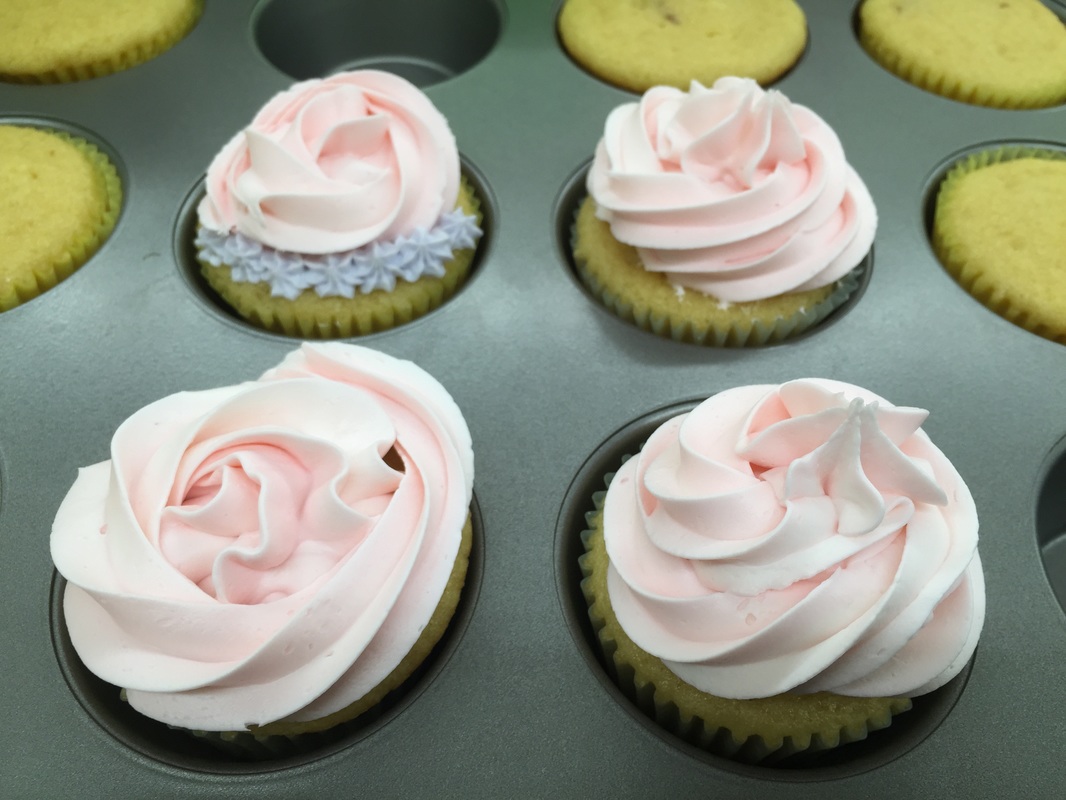
I cut most of the donuts into squares for jelly donuts but I made 40% of the dough into ring donuts. I topped some of them in just chocolate; some in chocolate with strawberry glaze drizzled over them, and some with chocolate and chocolate sprinkles. 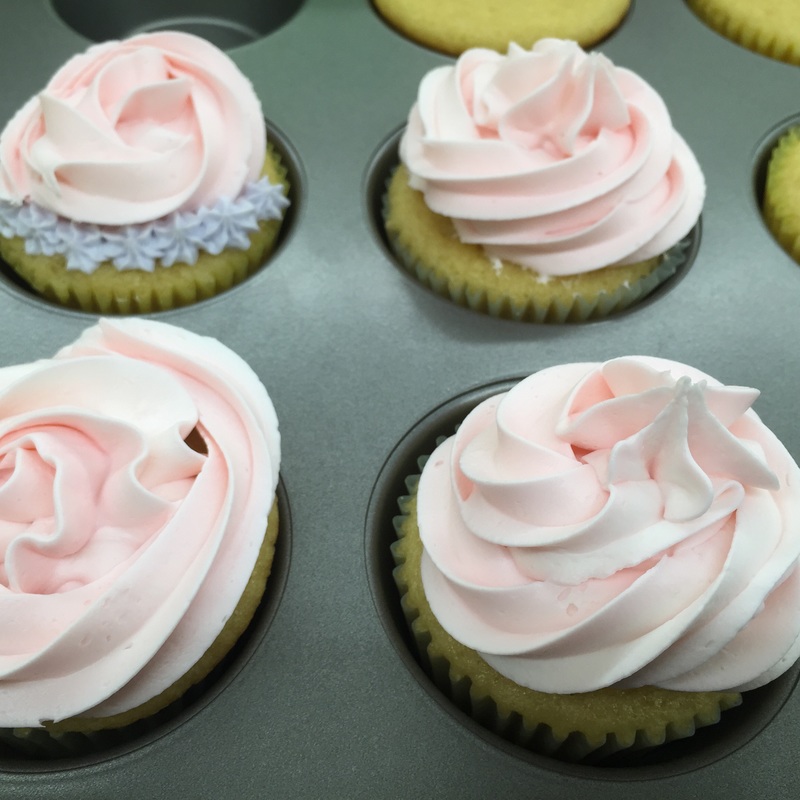 Lilac and Vanilla cupcakes with buttercream frosting I signed up for a cake decorating class. It's a 4-week course at my local craft store. For the first lesson, I needed to bring 6 un-iced cupcakes. I wanted a clean, easy and easy-to-make-dairy free recipe for simple vanilla cupcakes. I found this wonderful Williams Sonoma recipe for vanilla cupcakes. I replaced the butter with Earth Balance buttery sticks and I used my lilac sugar, which by now has a wonderful fragrant flavor and aroma. The cupcakes baked evenly, gave me a soft yet structured crumb and had a lovely combination of the vanilla and the lilac flavor. Now, on to the icing. I signed up for this class because my skills with a pastry bag have always been a little shaky, so I wanted some kind of formal training to make my baked goods look pretty as well as tasty. We really started with the basics, mainly straight lines, wavy lines, stars and rosettes. We mixed two different colors and played around with the star tips. I think I did okay for a first timer... 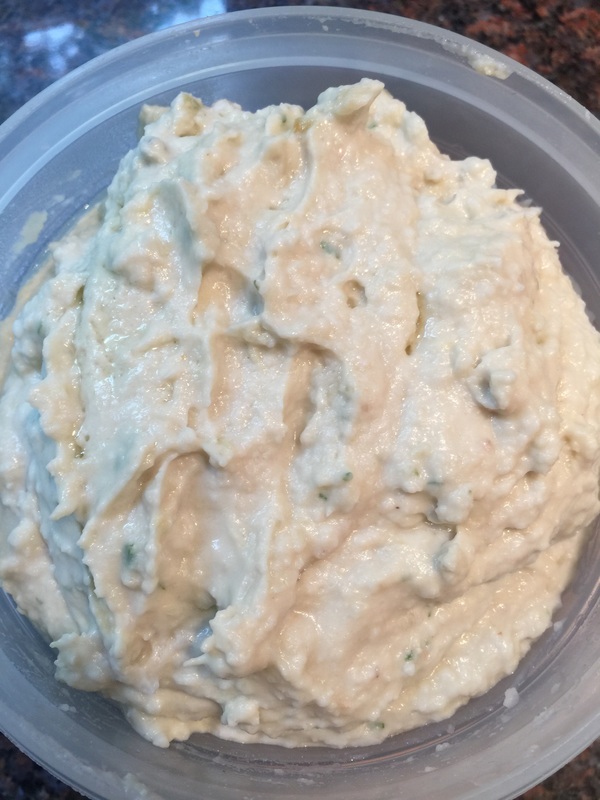 asted Garlic, Artichoke and White Bean Spread This is definitely a make-ahead spread. It's great if you know you have guests coming the next weekend and you want to make a dip. You can do a little bit every day, then finish it the morning they arrive. I enjoy it with some homemade sourdough bread - but it's also fabulous with chips. The roasted garlic gives it an incredible flavor, and by processing the beans as described below, you don't have any unwanted "beany" flavor/ordor or side effects. Ingredients:
Day 1-2
Day 3
Day 4
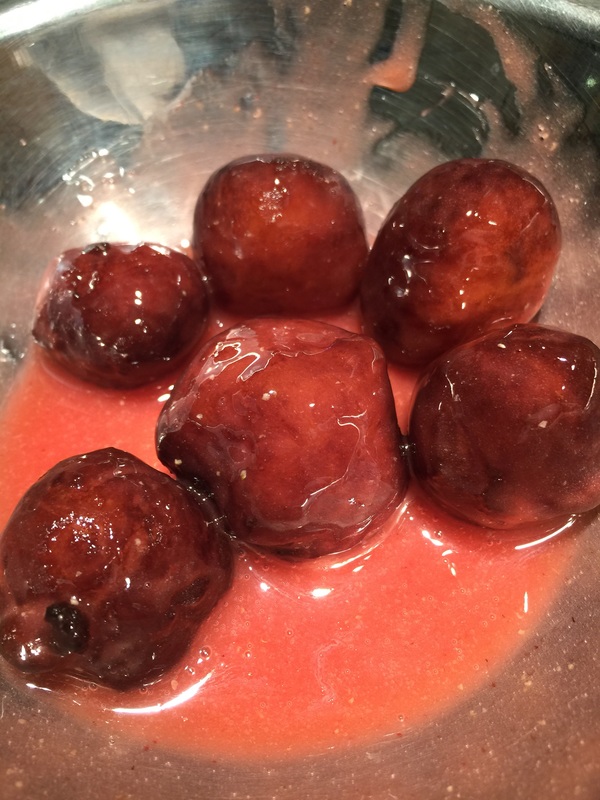
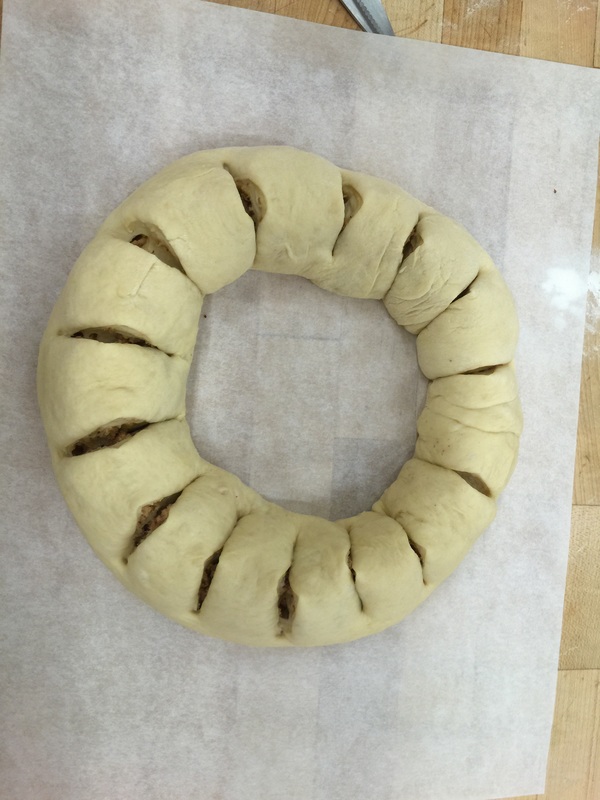
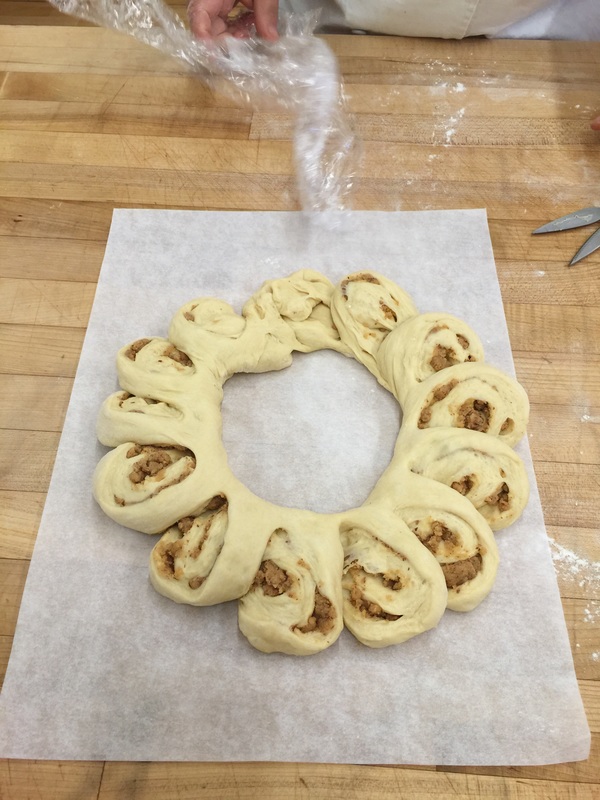
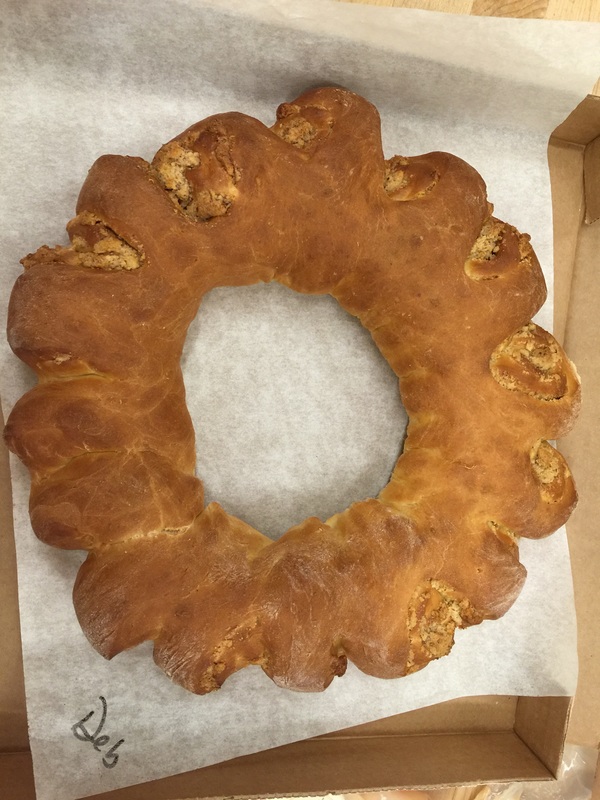
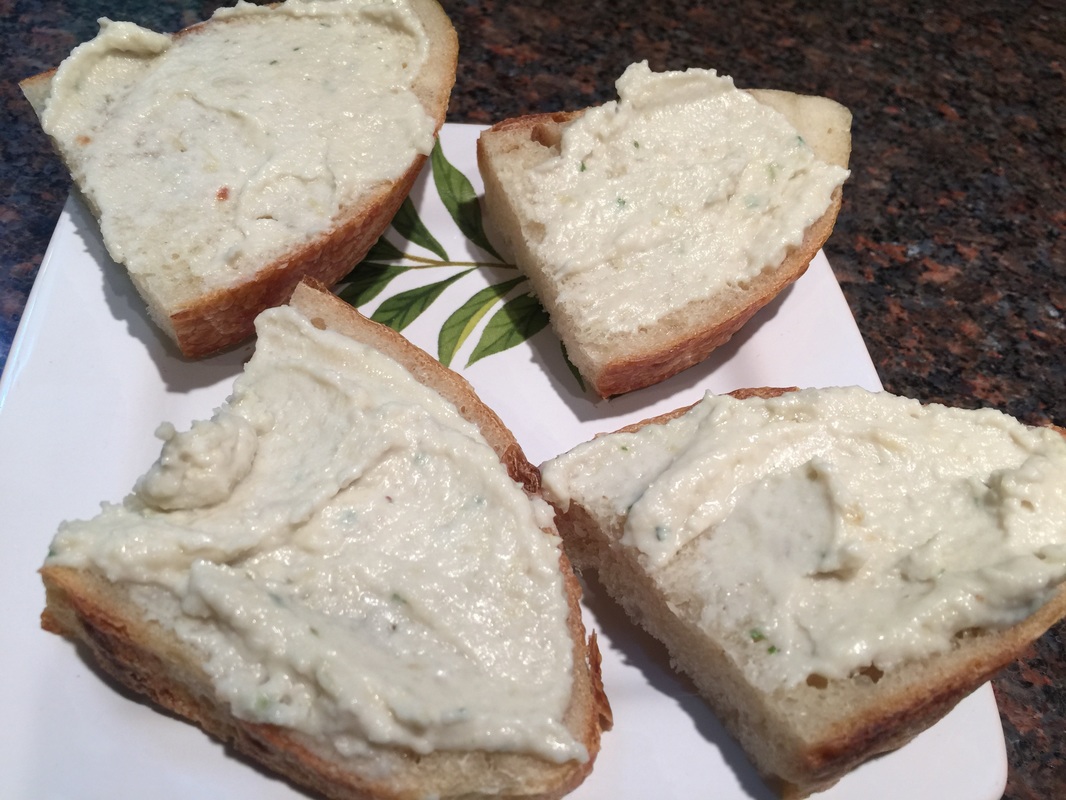 Roasted Garlic, Artichoke and White Bean Spread On Homemade Sourdough Bread. 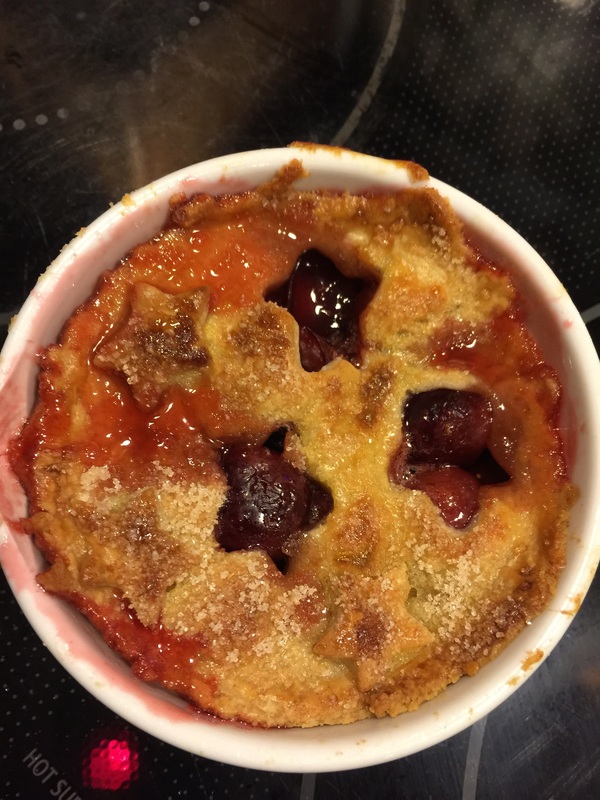 Single Serve Cherry Pie So, this is a dessert made of leftovers. I had some extra pie crust from when I made my strawberry rhubarb pie, some extra jam after making strawberry jam this morning, and I pitted a bunch of cherries, but not enough to make a whole pie. So, I put the cherries into a ramekin and poured the excess jam over them. Then I rolled out the pie crust and cut out star shapes. I painted on a little egg wash, and sprinkled a little lilac sugar on top. Then baked it for 25 min at 375F. 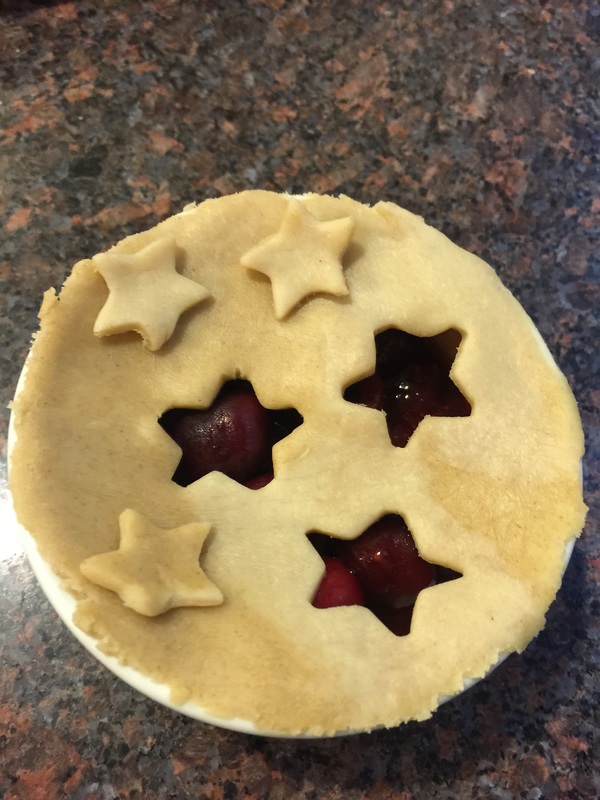 Single serve cherry pie before the bake 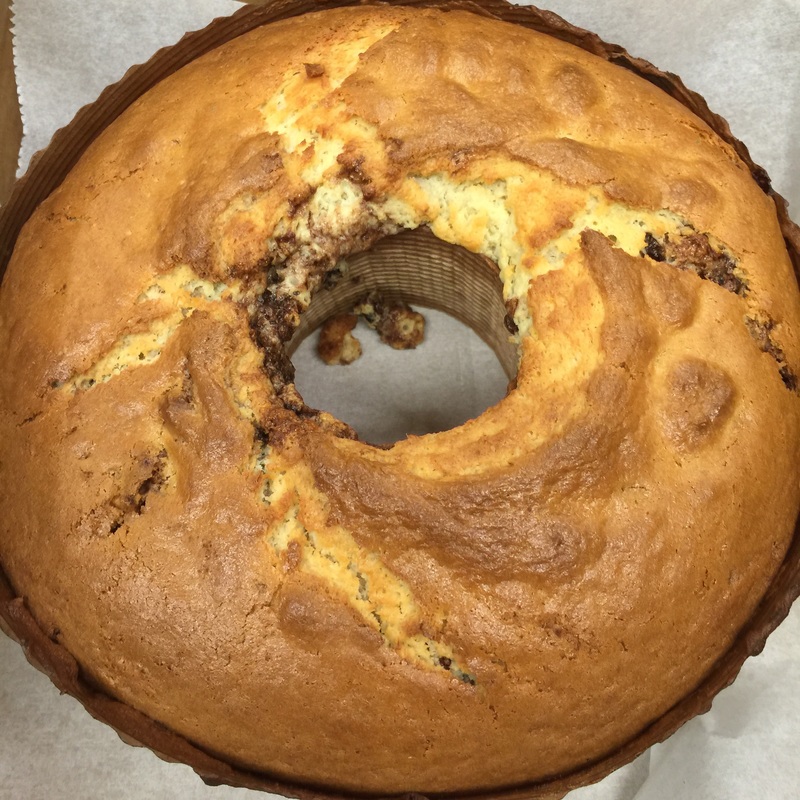 For this class, we made two very different cakes. The first was a sweet, yeasted bread filled with a ground almond mixture. It required two rises – a ferment and a proof – and after the bake, it’s iced with a sugared glaze. I couldn’t find the exact recipe online but this one is pretty close. The second was a more traditional coffee cake batter that we layered with a cinnamon sugar and walnuts filling. This was a fun cake to make and it wasn’t very difficult so we had some fun with it. We created about three layers in a paper tube pan. The process of making the almond ring was very similar to making a babka dough, but without the overnight cold ferment. The filling and shaping process felt very similar until we rolled the dough. Here we shaped the roll into a ring, and then using a pair of scissors, we cut slices into the ring, and twisted each piece so it lays flat on the parchment, forming a “petal” ring. The best part – eating the fruits of my labors. 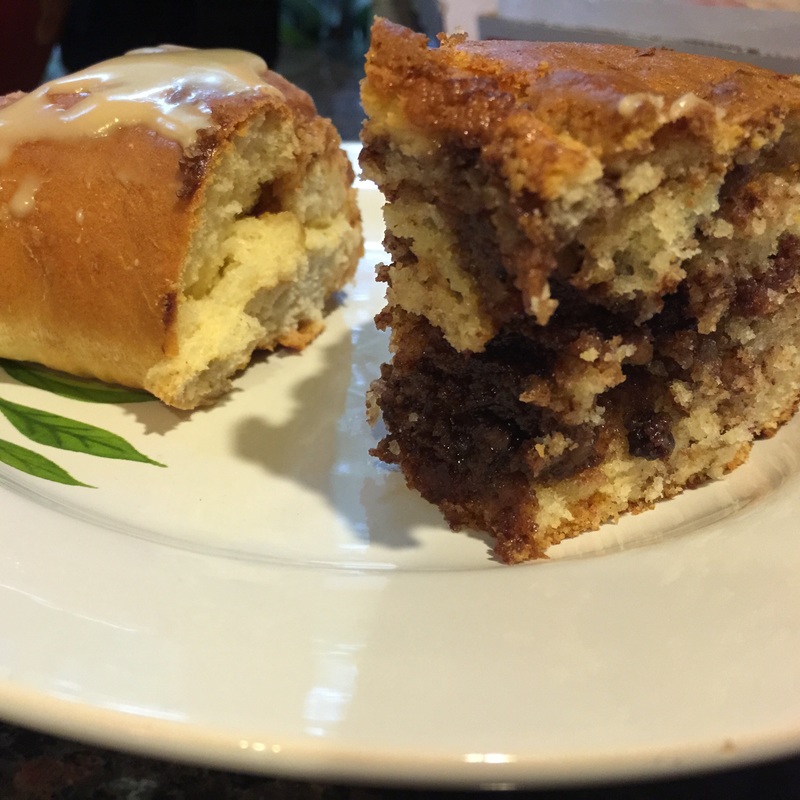 |
DebI'm a home cook with a lifelong passion for learning, exploring and experimenting in my kitchen. You can find me at @Debs1 on Twitter and @Debs121212 on Instagram. Categories
All
Archives
July 2020
|


 RSS Feed
